29 Sep Spanner Works: JP du Plessis
A regular feature, outlining the activities of FMM’s workshop personnel who are responsible for repairing, renovating, refurbishing and restoring the museum’s large and varied collection of vehicles. This month, technician JP du Plessis reports on how manager Lorenzo Farella got all strung up with a Merc…
One of the challenges with maintaining veteran and vintage cars is that there is little to no technical data available online or even in libraries. One has to rely on collectors of the specific type of vehicle or the older generation of automotive enthusiasts, who might have some old documentation tucked away on their shelves somewhere. Fortunately, when it comes to wheel alignment, there is a simple, cheap and effective way of ‘squaring’ the car to ensure alignment of all four wheels. It is called stringing.
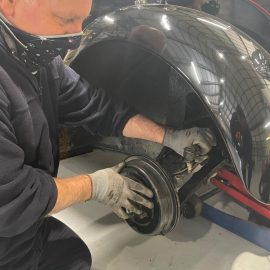
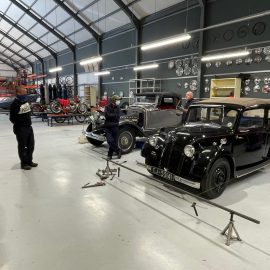
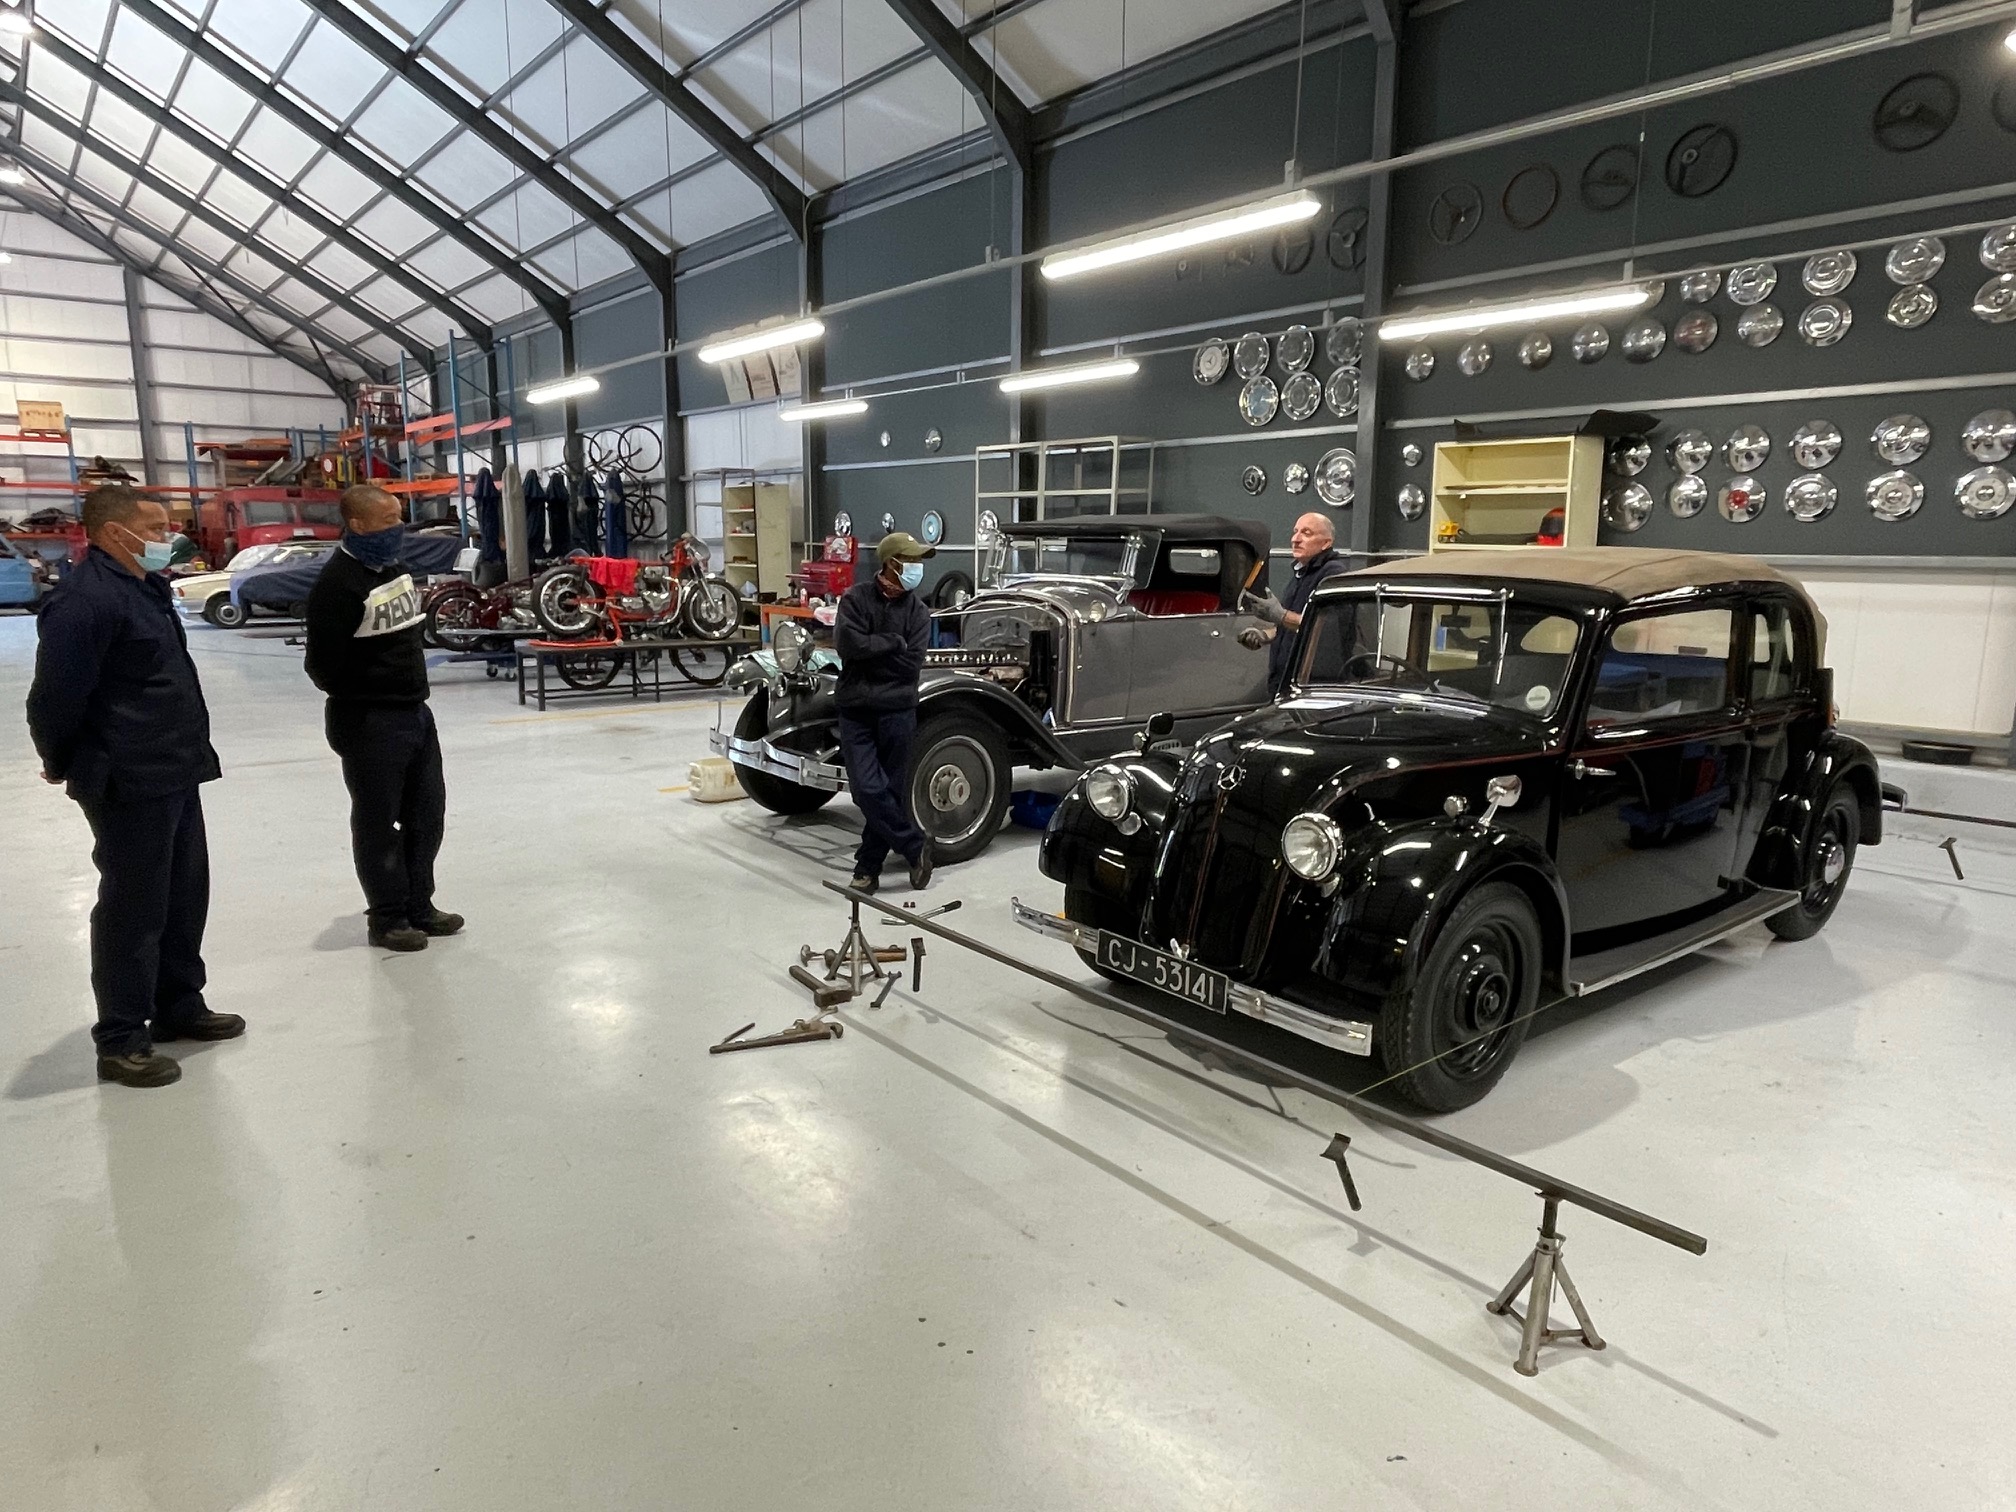
With the rubber steering coupling on the museum’s Mercedes-Benz 130H recently replaced, wheel alignment was required to ensure proper tracking. Workshop manager Lorenzo Farella took the time to show the team how to ‘string’ the car. The method requires four jack stands, weights, a ball of string and a tape measure. Or a builder’s line and a Vernier caliper in Lorenzo’s demonstration.
It’s important to set up the vehicle on an even and level surface. Then, a string is tied between two jack stands at a height of about the middle of, or slightly below, the wheel hubs. It is then positioned on the one side of the car, evenly spaced away from the hubs, spanning a little longer than the car’s wheel base.
Now you measure the distance from the sidewall of the first rear wheel against the string to make sure it measures the same, front and back, to be parallel. It really is an iterative process and may seem tedious, but overall it is simple to perform if you give yourself enough space to work with. Proper alignment is a rear end that is square to the centre of the chassis.
Before moving to the front end, ensure the steering wheel is centred as precisely as possible. One way to do this is to turn the steering wheel from lock to lock and then halve it to find the approximate centre as a baseline. Once the steering is confirmed to be parallel to the rear wheel, you can move to the front wheel on the same side. Check that the front and rear measurements of the front wheel are the same to ensure alignment with the rear. If the distance from the string to the front of the wheel is longer than at the rear of the same wheel, then the wheel is toed in. If both measurements of the front wheel are larger than the same measurements on the rear wheel, then the front wheel is inside the track of the rear wheel. The opposite is true when both measurements are smaller. On the car in this example, it required a couple of turns on the ball joint to adjust the proper toe. On most modern cars, one can simply loosen a bolt and shim up the suspension to adjust.
Another string is placed on the opposite side of the car on two jack stands, but instead of squaring it off the wheel, it is squared off the first string so that the two strings are parallel. This is to make sure measurements aren’t thrown off by a possible built-in toe offset (or if the rear-end is bent, but you’re not ready to fix it!). It is definitely a two-person job to get these perfectly parallel – one measuring, another moving to the measurement.
With the second string parallel with the first, you can now measure the distances on the opposite rear wheel to make sure it is straight. Being parallel to the first string and having measured the first rear wheel, you know the distances should mirror the first rear wheel measurements. Repeat the measuring and adjusting process on the opposite front wheel.
This method is really simple to use and allows you to make adjustments based on the measurements. This way you can also play around with different set-ups and sometimes club race cars are altered this way. However, the string may be replaced with laser level beams, with the technology being more affordable and freely available these days.